


If you’re new to hot composting, it’s completely normal for the first few weeks to take a little practice.
Whether you’ve just bought a HOTBIN, you’re about to set one up, or you’re worried because it isn’t behaving exactly how you expected, this guide explains what’s normal, what to tweak, and what “good progress” looks like in month one.
Why hot composting can take a little practice (and why that’s normal)
A common first-time expectation is that you can simply throw everything in as it comes and the bin will do the rest. In reality, like any compost bin, HOTBIN still needs a few basic conditions to work well, the difference is that when those conditions are right, you can compost faster and more efficiently.
In the first few weeks, most “it’s not working” moments come down to the same simple causes:
- Feeding pattern: hot composting likes consistency. Feed little and often rather than long gaps followed by one big fill.
- Overfeeding vs underfeeding: too much at once can restrict the amount of space you have to add new fresh waste; too little (or too infrequent) can let it cool down.
- Moisture balance: lots of wet kitchen waste with no balancing material can make the mix soggy and slow.
- Airflow: compost needs air. If the contents compact, temperatures drop and smells can increase.
- Bulky materials: adding woody material (woodchip or bark) helps keep the heap aerated and active - This eliminates the need to turn and fork a heap.
- Waste size: smaller pieces break down faster, chopping bulky items helps heat build more reliably.
If any of that sounds familiar, it doesn’t mean you’re doing anything “wrong”, it usually just means your compost is asking for a small adjustment (often: add dry/bulky material and get back into a steady feeding rhythm).
How long does a HOTBIN composter take to heat up?
In HOTBIN’s experience, and from customer feedback, after creating your base layer and filling the bin half full, the heap temperature typically reaches 40°C or greater within 48–72 hours. If you don't quite reach 40°C in this time continue with the following.
- Feed your HOTBIN 2–3 times a week
- Keep your mix balanced by adding - shredded paper and woodchip as required
This will prevent the heap getting overly wet or compacted - Continuing to stir the top layer after adding fresh waste can also energise the bacteria with oxygen.
A quick note on seasonality
Yes, season matters. Unlike many other composting solutions HOTBIN can compost year-round with sustained feeding, but in colder months it may take more attention to maintain performance, especially if the outside temperature drops below freezing, bin is underfed, too wet, or lacking airflow.
Why temperature matters (and why fluctuations don’t mean its not working)
Hot composting works faster at higher temperatures. A useful way to think about it:
- Average 10°C heap → takes around 12 months
- Average 20°C heap → takes around 6 months
- Average 30°C heap → takes around 3 months (90 days)
So if your thermometer isn’t sitting in the green zone all the time, don’t panic the HOTBIN is still composting. Temperature can fluctuate due to what you feed, moisture, airflow, weather and feeding routine.
How often to feed your composter in the first month
The most important habit for first-time HOTBINers is this:
Try to avoid long gaps followed by one large fill of waste, or repeatedly adding wet kitchen waste with no balancing material.
Minimum weekly waste to keep your compost bin hot
Use this as a guide for the minimum weekly input needed to help maintain heat:
| HOTBIN model | Min weekly waste to stay hot | Easy visual guide |
|---|---|---|
| HOTBIN Mini 100 | 2.5kg (or 5 litres) | Approx. 1 small kitchen caddy |
| HOTBIN 200 | 5kg (or 10 litres) | Approx. 2 small kitchen caddies |
| HOTBIN Mega 450/700 | 20kg (or 40 litres) | Approx. 1 mower box or ½ wheelbarrow |
Obviously you can add more waste than these amounts if you have it, however if you regularly feed below these levels, the heap may cool down, especially in colder weather.
Note. If you have loads of waste don't completely fill the bin in one go.
What to feed in weeks 1–2 (best practice, not strict rules)
- Prioritise easy-to-digest food and garden waste
- Chop waste where possible (smaller pieces break down faster)
- Balance wet kitchen waste materials with shredded paper/card
- Add woody/bulky material for airflow
- Avoid overloading the bin with one waste type, a mix is best
- Give the top of the heap a light stir with the rake after adding fresh waste
Top 25 Items to Get Your Compost Bin Started
- Fruit peelings
- Vegetable waste peelings
- Salad leaves
- Soft fruit scraps
- Apple cores (chopped if possible)
- Banana skins (chopped)
- Citrus peel (small amounts, chopped)
- Tea bags (rip open)
- Loose tea leaves
- Coffee grounds
- Coffee filters (paper)
- Crushed eggshells
- Any uncooked leftovers/plate scrapings
- Cooked vegetable scraps
- Small amounts of cooked rice (once the heap is over 40°C )
- Small amounts of cooked pasta (once the heap is over 40°C)
- Root systems from spent crops (shake of excess soil)
- Torn/shredded cardboard (amazon packaging)
- Leaves (mulch with mower if possible)
- Deadheaded flowers
- Plant stems (chopped)
- Soft prunings (chopped)
- Spent annual bedding plants (chopped)
- Wilted herbs
- Small amounts of grass clippings (click the link for tips)
How to balance wet waste, shredded paper and woodchip
This is one of the keys to HOTBIN success. Many first-time users add plenty of kitchen waste, but not enough material to manage moisture and airflow.
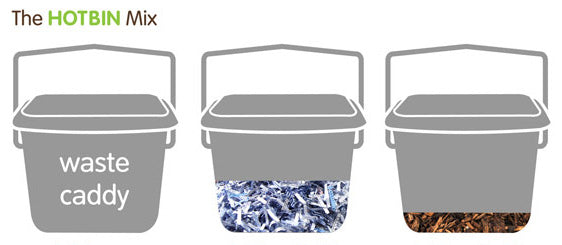
You can adjust these quantities depending on how wet or dry the waste is.
Examples:
- Grass contains moisture → add a couple of extra handfuls of paper and woodchip
- Leaves are dry → usually no need to add paper
-
Prunings/stems are bulky and dry → usually no need to add paper or woodchip
What to avoid adding too early (or in large amounts)
- Cooked food, wait until the heap is up to temperature (40–60°C)
- Whole / unchopped fruit and veg, chop first to help breakdown
- Too much grass - limit to about half a mower box every couple of weeks
- Too much of one type of material - Aim for a mix of different waste
How to check HOTBIN temperature (without panic-checking)

You can check the lid thermometer whenever you like, it’s useful for a quick view.
For a more accurate reading of the heap itself:
- Insert the internal thermometer into the top of the heap
- Leave it for around 60 seconds
- Take the reading (remove the probe so it doesn't get buried )
- Close the lid promptly (don’t leave it open for extended periods)
What “good enough” progress looks like in your first month
In the first month, the goal is not perfection it’s building a routine and learning how your HOTBIN behaves.
- You build a proper base layer and reach a good working mass of material.
- The bin starts to warm up (and may fluctuate while you learn the balance).
- You learn how your HOTBIN responds to wet waste, shredded paper and woodchip.
- You feed it 2–3 times a week rather than in random large dumps.
- You make a few tweaks (that’s normal) and feel more confident week by week.
- You visibly notice the level of waste drop as waste heats up and decays
- You hit the green zone on the internal thermometer (Happy Days)!
- When you open the lid you things smell earthy and natural, not nasty.
Early wins in month one are usually heat, habit and confidence - with compost quality improving as your routine and management of the system develops.
What finished HOTBIN compost should look like (and why it won’t look like bagged compost)
Homemade compost is not the same as bagged garden centre compost. That doesn’t mean it isn’t good compost.
Compost you harvest from your HOTBIN is often wetter and stickier when first removed, especially when active and rich in humus. That can surprise people, but it’s normal.
1) Fresh, active top-layer material (less than a month old)
- Identifiable pieces of waste
- The odd teabag
- Warmth
- White composting mould (normal)
Best use: If you remove material like this, add it back into the HOTBIN with fresh waste to reprocess it.
2) Mulch-like compost (around 30 days of hot composting)
- Dark colour
- No easily identifiable pieces
- Slightly sticky texture
Best use: Perfect for mulching and nourishing vegetable beds and flower beds. You can also leave it a further month or two to mature.
3) Mature compost (minimum around 90 days)
- Dark brown to black colour
- Broken-down texture
- Earthy smell (if everything has gone to plan)
HOTBIN compost often feels sticky and moist when first removed, but crumbly when drier. The stickiness is linked to humus, which supports healthy soil by holding moisture and nutrients.
Best use: Container planting, digging into beds, soil improvement and top dressing.
Note: If anything isn’t fully composted, add it back into the top of the HOTBIN and reprocess it with new waste.